

Shock Absorber Boot Maker Guide to Choosing Durable Suspension Protection
2026-11-16
Every suspension component lives under constant attack from grit, water, and road debris. While most drivers focus on shocks and struts, the humble boot is often the first line of defense—and the first to fail. Choosing a shock absorber boot from a maker who understands real-world wear isn’t just smart; it’s the difference between a suspension that lasts and one that deteriorates quietly. In this guide, we’ll walk through what separates durable protection from cheap rubber, and why choosing a specialist like XIAYI can extend the life of your entire suspension setup well beyond expectations.
What Actually Kills a Shock Boot Before Its Time
Most people assume a shock boot simply rots from old age, but the real damage usually starts much earlier. Dirt and grit get trapped between the boot folds, and every suspension cycle turns that grit into sandpaper. The constant flexing concentrates wear at the creases until small tears open up and let moisture inside.
Heat is another quiet killer. A boot mounted close to the exhaust or brake components sees repeated heat spikes that harden the rubber long before it would naturally degrade. Once it loses flexibility, it stops stretching with the shock body and starts cracking at the mounting lips instead.
Installation mistakes speed things up too. Over-clamping the top or bottom, twisting the boot during alignment, or using a boot that is slightly too short forces the material to stretch past its comfort zone on every stroke. That constant tension is what finally splits an otherwise healthy boot down the side.
Reading the Rubber Compound Like a Mechanic, Not a Marketer
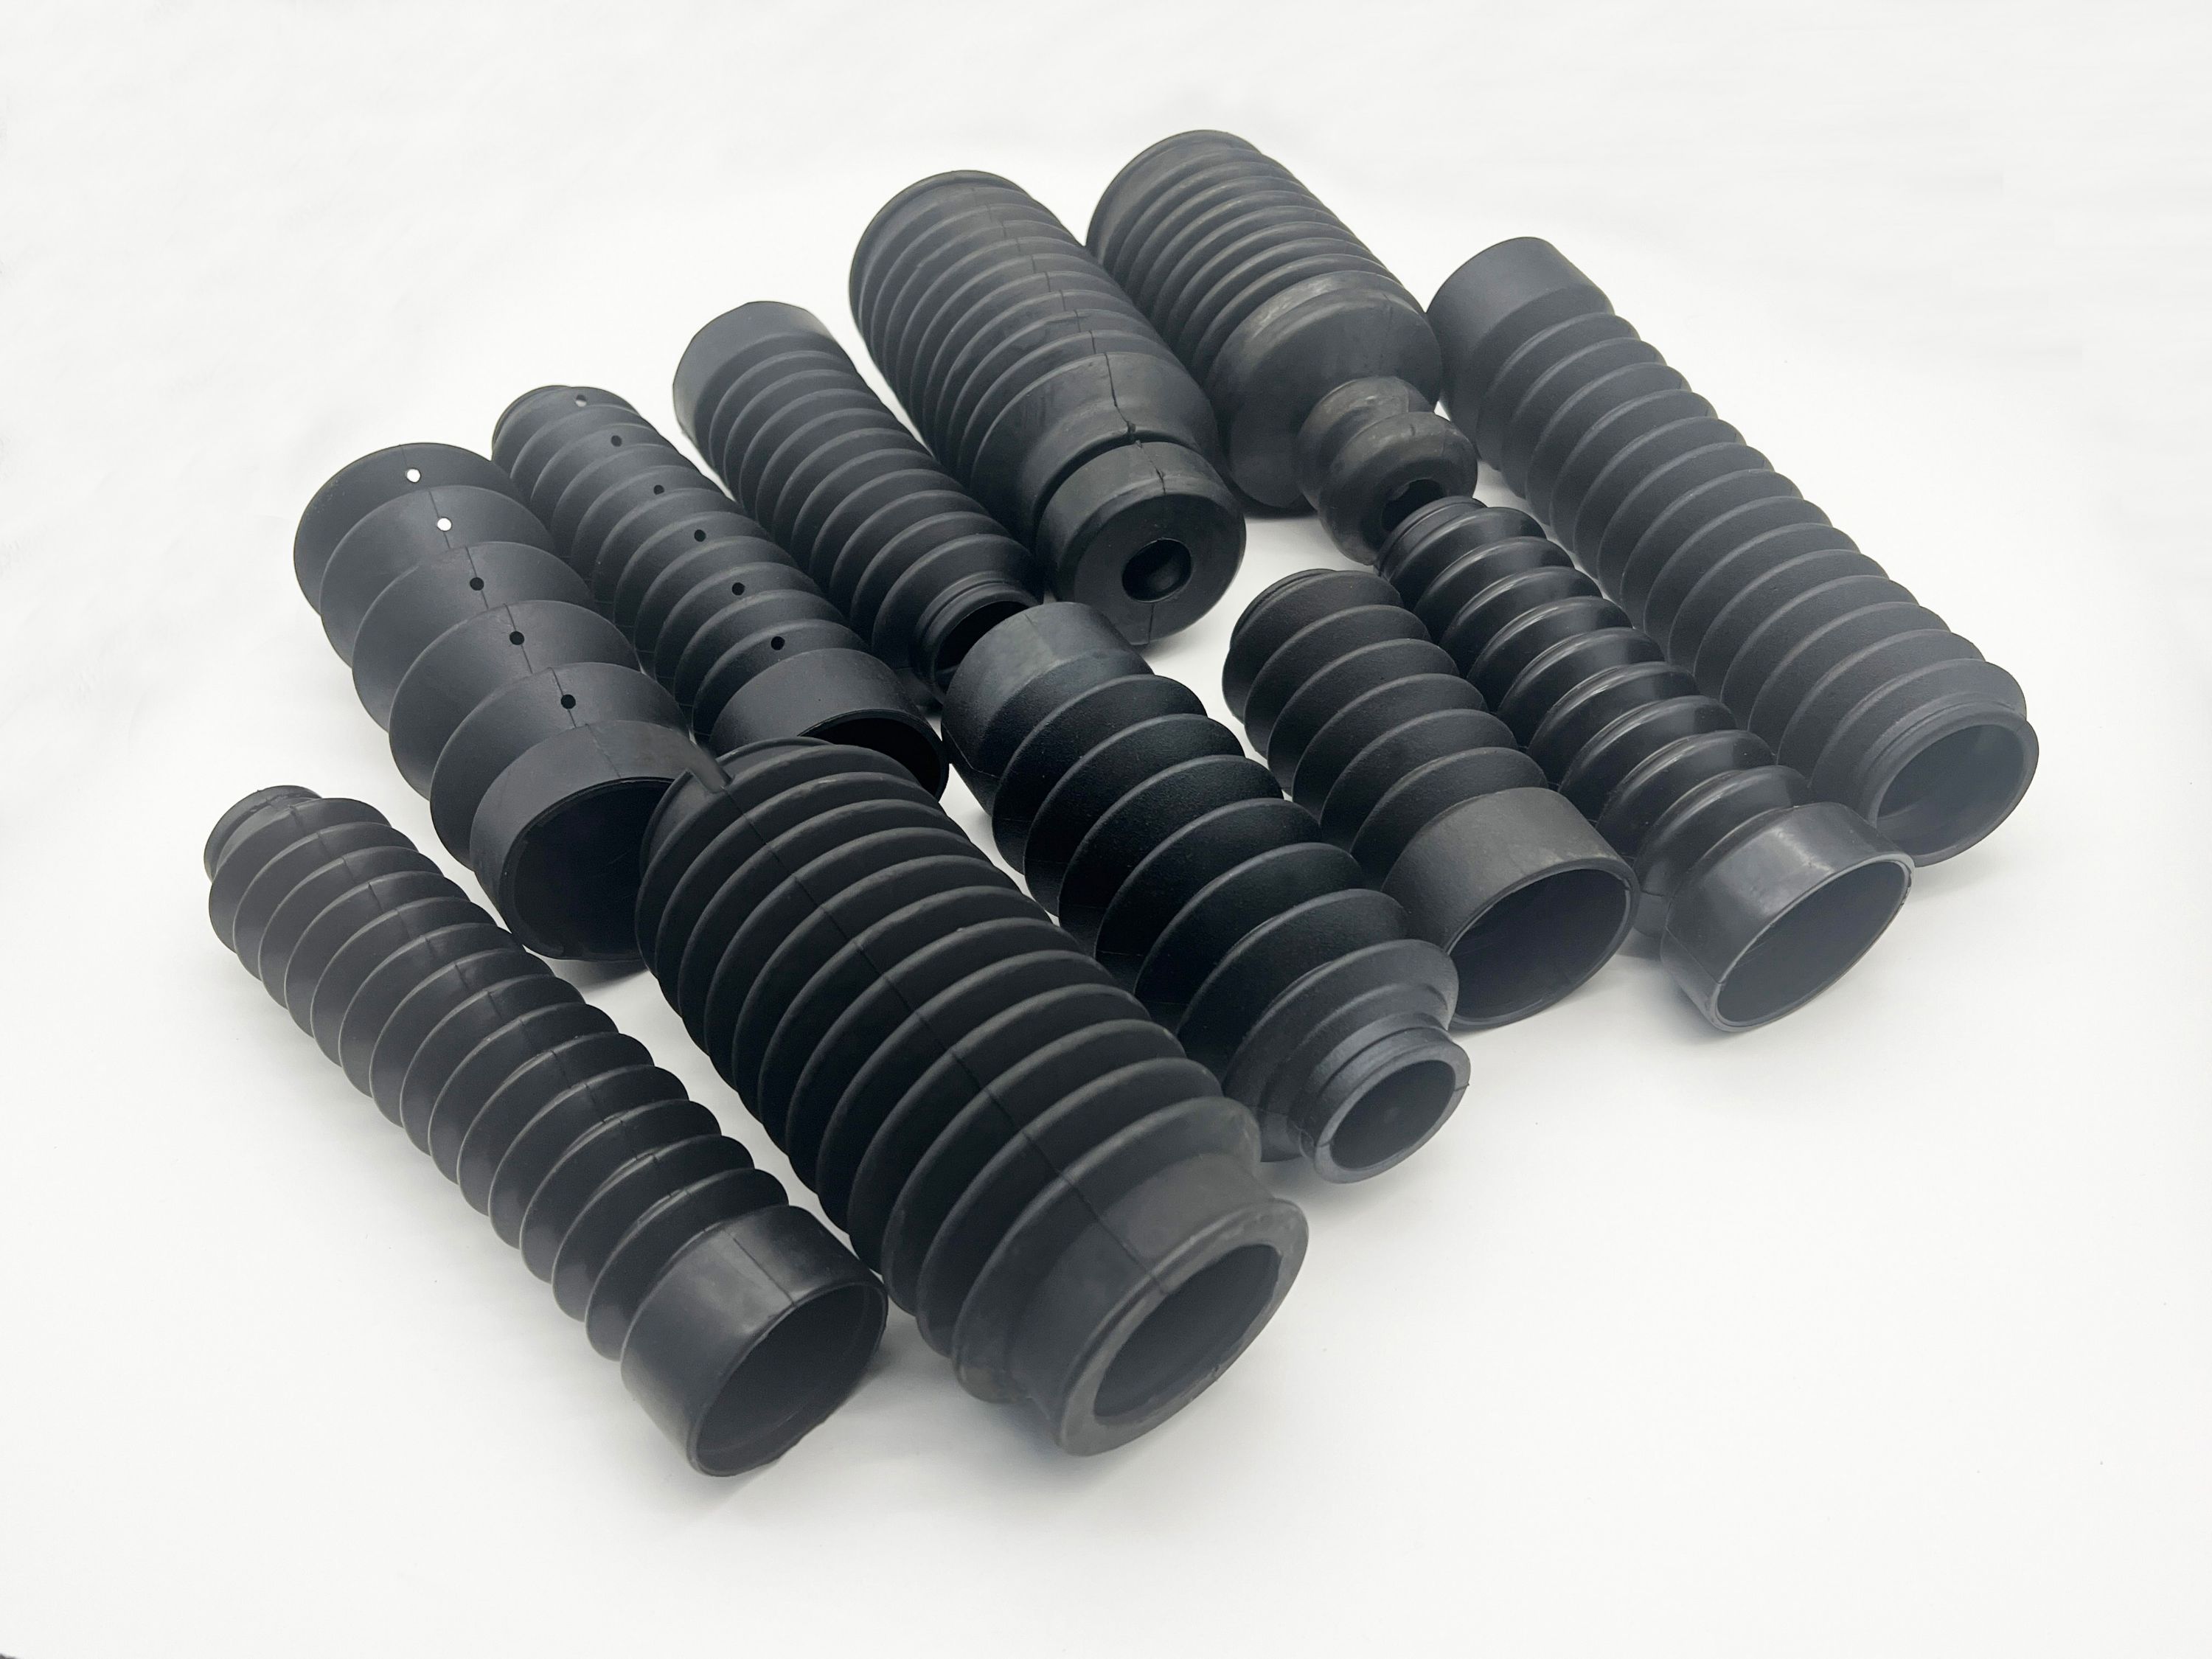
A mechanic doesn’t start with the technical data sheet. They cut a slab from the batch and press a thumbnail into it, watching how fast the indent relaxes. That small rebound tells them something about filler structure and crosslink density long before a rheometer trace gets printed. Then they stretch a strip until it snaps and listen to the way it tears; a dull, ragged break means something different from a clean, high-pitched snap.
They also pay attention to how the compound behaves during mixing and on the mill. A slight change in banding temperature, a little more bloom on the surface, or a different smell during vulcanization are not just cosmetic details. They are early warnings that the raw material lot changed, the oil level drifted, or the cure package is not reacting the way it did last week. The numbers might still be within specification, but the hands already know the job will feel different on the press.
This kind of reading is built from repeated runs, scrap parts, and time spent troubleshooting on the floor. It treats a formulation as a living material rather than a list of branded ingredients. A marketer sees a smooth black sheet; a mechanic sees a batch that will feed, fill, vent, and release without making life difficult for the operator.
Fitment First: Why 'Universal' Rarely Means Universal
A “universal” part usually means the manufacturer found a way to cover several vehicles with one SKU, not that it bolts on cleanly in every case. The adjustment slots, extra hose length, and adapter rings that make this possible often require trimming, drilling, or repositioning nearby components. What fits a base model may hit an oil cooler on a towing package, or the mounting ear that clears one radiator support can sit too high on another.
Checking the actual fitment notes against your vehicle’s year, engine, and trim is more useful than trusting the label. Even within the same model run, a mid-year production change can alter bracket spacing or move a sensor wiring route just enough to turn a quick install into a guessing game. If a listing cannot confirm your exact submodel, treat it as a project part rather than a direct replacement.
That does not mean every universal item is worthless. Some designs earn the name because they are genuinely adjustable, but that only helps if you have the tools and patience to make the final fit work. For anything connected to cooling, fuel, or braking, the safer move is usually a component listed for your specific build instead of a broad promise.
Bellows Design and the Dirt That Slips Through
The pleats of a bellows are often treated as a simple light-sealing feature, but they behave more like a row of tiny catch basins. Every time the bellows extends or compresses, the changing internal volume pulls air through the smallest openings around the lens board and rear standard. Whatever drifts in with that air tends to settle in the folds, and the tighter the pleats, the easier it is for fine particles to wedge themselves out of sight.
The real problem starts when those trapped particles shake loose during a shoot. A focusing adjustment or a slight nudge of the rail can send dust from the folds onto the film plane or the rear element of a lens. Blowing air into the folds rarely fixes this because the debris simply moves from one crease to another, waiting for the next movement to dislodge it again.
A more dependable habit is to extend the bellows fully in a clean, still space and go over each fold with a soft brush and a vacuum held just off the surface. Collapsing the camera slowly after cleaning helps prevent the folds from squeezing remaining grit toward the imaging area. The design will always collect some dirt, but keeping the pleats from becoming a hidden reservoir can stop most of it from reaching the parts that show up in the frame.
Hardware, Clamps, and the Small Parts That Fail First
Most failures don't announce themselves through major structural collapses. They start quietly in the hardware nobody bothers to inspect: a zinc-plated clamp that has been over-tightened, a split lock washer that lost its tension, or a tiny retaining ring that snapped after one too many vibration cycles. These components carry disproportionate responsibility for holding larger assemblies together, yet they are often selected by cost rather than by the actual load, finish, or service temperature they will face.
Clamps are a common starting point for trouble. A worm-gear clamp may look secure long after the screw has stripped its slots, while the band itself cuts into soft hose or tubing. Spring clamps lose grip as they heat-cycle, and rigid pipe clamps can create galvanic corrosion when the metal pair is wrong. Once a clamp begins to slip, the movement it allows turns into wear on everything around it, which is why a loose clamp is rarely just a loose clamp.
The parts that fail first also tend to be the ones that get replaced blindly. Threaded inserts, shoulder screws, circlips, and small pivot pins fail from fatigue, misalignment, or simply because they were installed dry when they should have been lubricated. Keeping spares of these unglamorous pieces, checking torque values rather than guessing, and replacing hardware at the first sign of deformation prevents a five-cent part from turning into a much larger repair.
When a Premium Boot Costs Less Than a Cheap One
Most people treat price tags as a reliable shortcut: higher number, better boot. That logic collapses the moment you compare a full-grain leather boot bought on clearance against a fast-fashion pair sold at full retail. The cheap boot might survive one wet winter before the glued sole starts peeling, while the premium option can be resoled and worn for a decade. You are not really spending more when the cost per wear drops below what you would lose replacing the cheaper pair every year.
There is also a quiet advantage in how a well-made boot lets you forget it. No pinched seams, no cracked lining, no squeak that announces every step. That kind of reliability feels invisible until you go back to a budget pair and notice all the small compromises you had stopped questioning.
FAQ
Most early failures start with material fatigue, not impacts. Constant flexing near the bellows folds creates micro-tears, and once dirt or salt gets inside, abrasion does the rest. Boots with rigid or thin-walled folds tend to crack at the root of the pleat within months, while a compound with decent rebound and a slightly thicker flex zone holds up much longer.
Not always. Polyurethane resists tearing and chemicals well, but hard, brittle grades can crack in freezing temperatures. A quality natural or synthetic rubber boot often flexes better on a daily driver. The better choice is usually a mid-durometer polyurethane or a well-formulated rubber blend rather than chasing one material name.
Check the collapsed and extended lengths of the shock body, then compare them to the boot's compressed and stretched measurements. Also look at the top and bottom opening diameters. A boot that is stretched tight at ride height will tear at the mounting points, while one that bunches too much traps debris.
The boot is the first line of defense for the piston rod and seal. Once it splits, grit and water sit against the rod and get pushed into the seal during suspension travel. That scores the rod, wears the seal, and eventually leads to oil seepage and reduced damping. The strut or shock often needs replacement long before it would have with an intact boot.
Using the old rusted bump stop cup or forcing the boot over a burred rod end is a common one. Another is clamping the bottom too tightly onto the shock body, which cuts the rubber. Leaving the boot twisted after assembly also creates constant stress at the folds. Clean the mating surfaces, deburr the rod, and let the boot sit neutral before tightening anything.
After any run through mud, deep water, or rocky terrain is ideal, but a practical routine is every second fuel stop or before and after a trip. Look for pinch marks, creases that stay white when flexed, and debris packed into the folds. Catching a small tear early can sometimes be patched temporarily, but replacement is the only real fix.
They can, but only if the vents are placed low and shielded. A poorly placed vent lets water in instead of out. A better approach for wet mud is a boot with fewer but deeper folds and a tight upper seal, because shallow folds trap mud and turn into sandpaper against the rod.
For most vehicles, yes, as long as the bellows are not overly complex. Extra folds give the boot room to compress without pinching, which reduces tearing. The downside is that very fine accordion folds can hold grit. A moderate bellows design with smooth, rounded pleats tends to balance flex and debris shedding better than either a plain sleeve or an overly intricate bellows.
Conclusion
Shock boots rarely fail from a single dramatic impact. They break down in places few people inspect: inside the bellows folds, under the clamp, where heat, ozone, and trapped grit slowly eat away at the rubber. A compound that feels soft and tacky in your hand is not necessarily tough; often that surface signals heavy filler and poor long-term weather resistance. Press a thumbnail into the material and watch how it recovers. A slow rebound usually means the blend will harden, shrink, and split after a season or two. Generic sizing causes the same early failure in a different way. Forcing a 'universal' boot over a strut body, or stretching it to cover a longer shaft, keeps constant tension on the ends, so the rubber tears long before the rest of the part is worn. Bellows shape matters just as much. Tight, even folds shed dirt and water, while wide or uneven pleats trap fine sand and salt, turning every suspension cycle into a small abrasion test.
In many cases the rubber is not even the first part to go. Thin clamps, cheap zip ties, and soft bump stops corrode or loosen, letting the boot slide down and expose the shaft. That is why worthwhile protection includes hardware that can survive road salt, mud, and repeated flexing. Price is also best judged over time. A vehicle-specific boot with the right compound and balanced folds may cost more upfront, but it can outlast two or three cheaper replacements. When the seal holds and the hardware stays tight, the entire suspension assembly stays cleaner, so the higher initial cost quietly pays for itself.
Contact Us
Contact Person: Leela
Email: [email protected]
Tel/WhatsApp: 8613586885132
Website: https://www.xiayishockparts.com