

Custom HDPE Pipe Production Line: A Complete Guide to Planning and Implementation
2026-11-03
Setting up a custom HDPE pipe production line involves far more than picking machines off a shelf—it’s a balancing act between extruder specs, downstream equipment, and long-term scalability. This guide walks you through the essential planning and implementation steps, from initial capacity calculations to final commissioning. Drawing on real-world insights from COMRISE, you’ll discover how to avoid costly oversights and build a line that truly fits your production goals. Ready to turn complexity into clarity?
Start with the End: Defining Your Pipe’s Real-World Demands
Too many pipe projects begin with a vague idea of “something that moves fluid,” then stumble when the actual operating conditions hit. Instead, flip the process: start by writing down the exact output you expect at the far end—flow rate, pressure drop tolerance, temperature swings, chemical exposure, and even how often someone will need to clean or replace the line. This isn’t about picking a material or diameter yet; it’s about pinning down the constraints that will quietly destroy an under-specified pipe within months. Once you have that list, every later decision becomes a filter, not a guess.
Think of real-world demands as the non-negotiables that show up only after installation: a food plant that flushes with hot caustic every night, an outdoor run that cycles from freezing mornings to blazing afternoons, a buried line that must survive ground settlement. If you define these before opening a catalog, you avoid the trap of choosing a pipe that looks fine on paper but shears at a fitting or turns brittle after a season. Write down the harshest condition the pipe will face, not the average one—averages hide the failure points. Then add a margin for operator error, because someone will eventually run the system beyond spec.
Finally, let the end demands shape your evaluation criteria. Instead of comparing pipes by price per foot, compare them by cost per year of meeting those demands. A slightly more expensive material that shrugs off thermal cycling saves you from a shutdown at 3 a.m. A heavier wall that resists abrasion from slurries prevents a mid-batch leak. When you start with the end, the pipe selection becomes obvious—you’re no longer choosing among similar products, you’re eliminating everything that doesn’t survive your written list.
Matching Screw Design and Die Geometry to Your Resin Mix
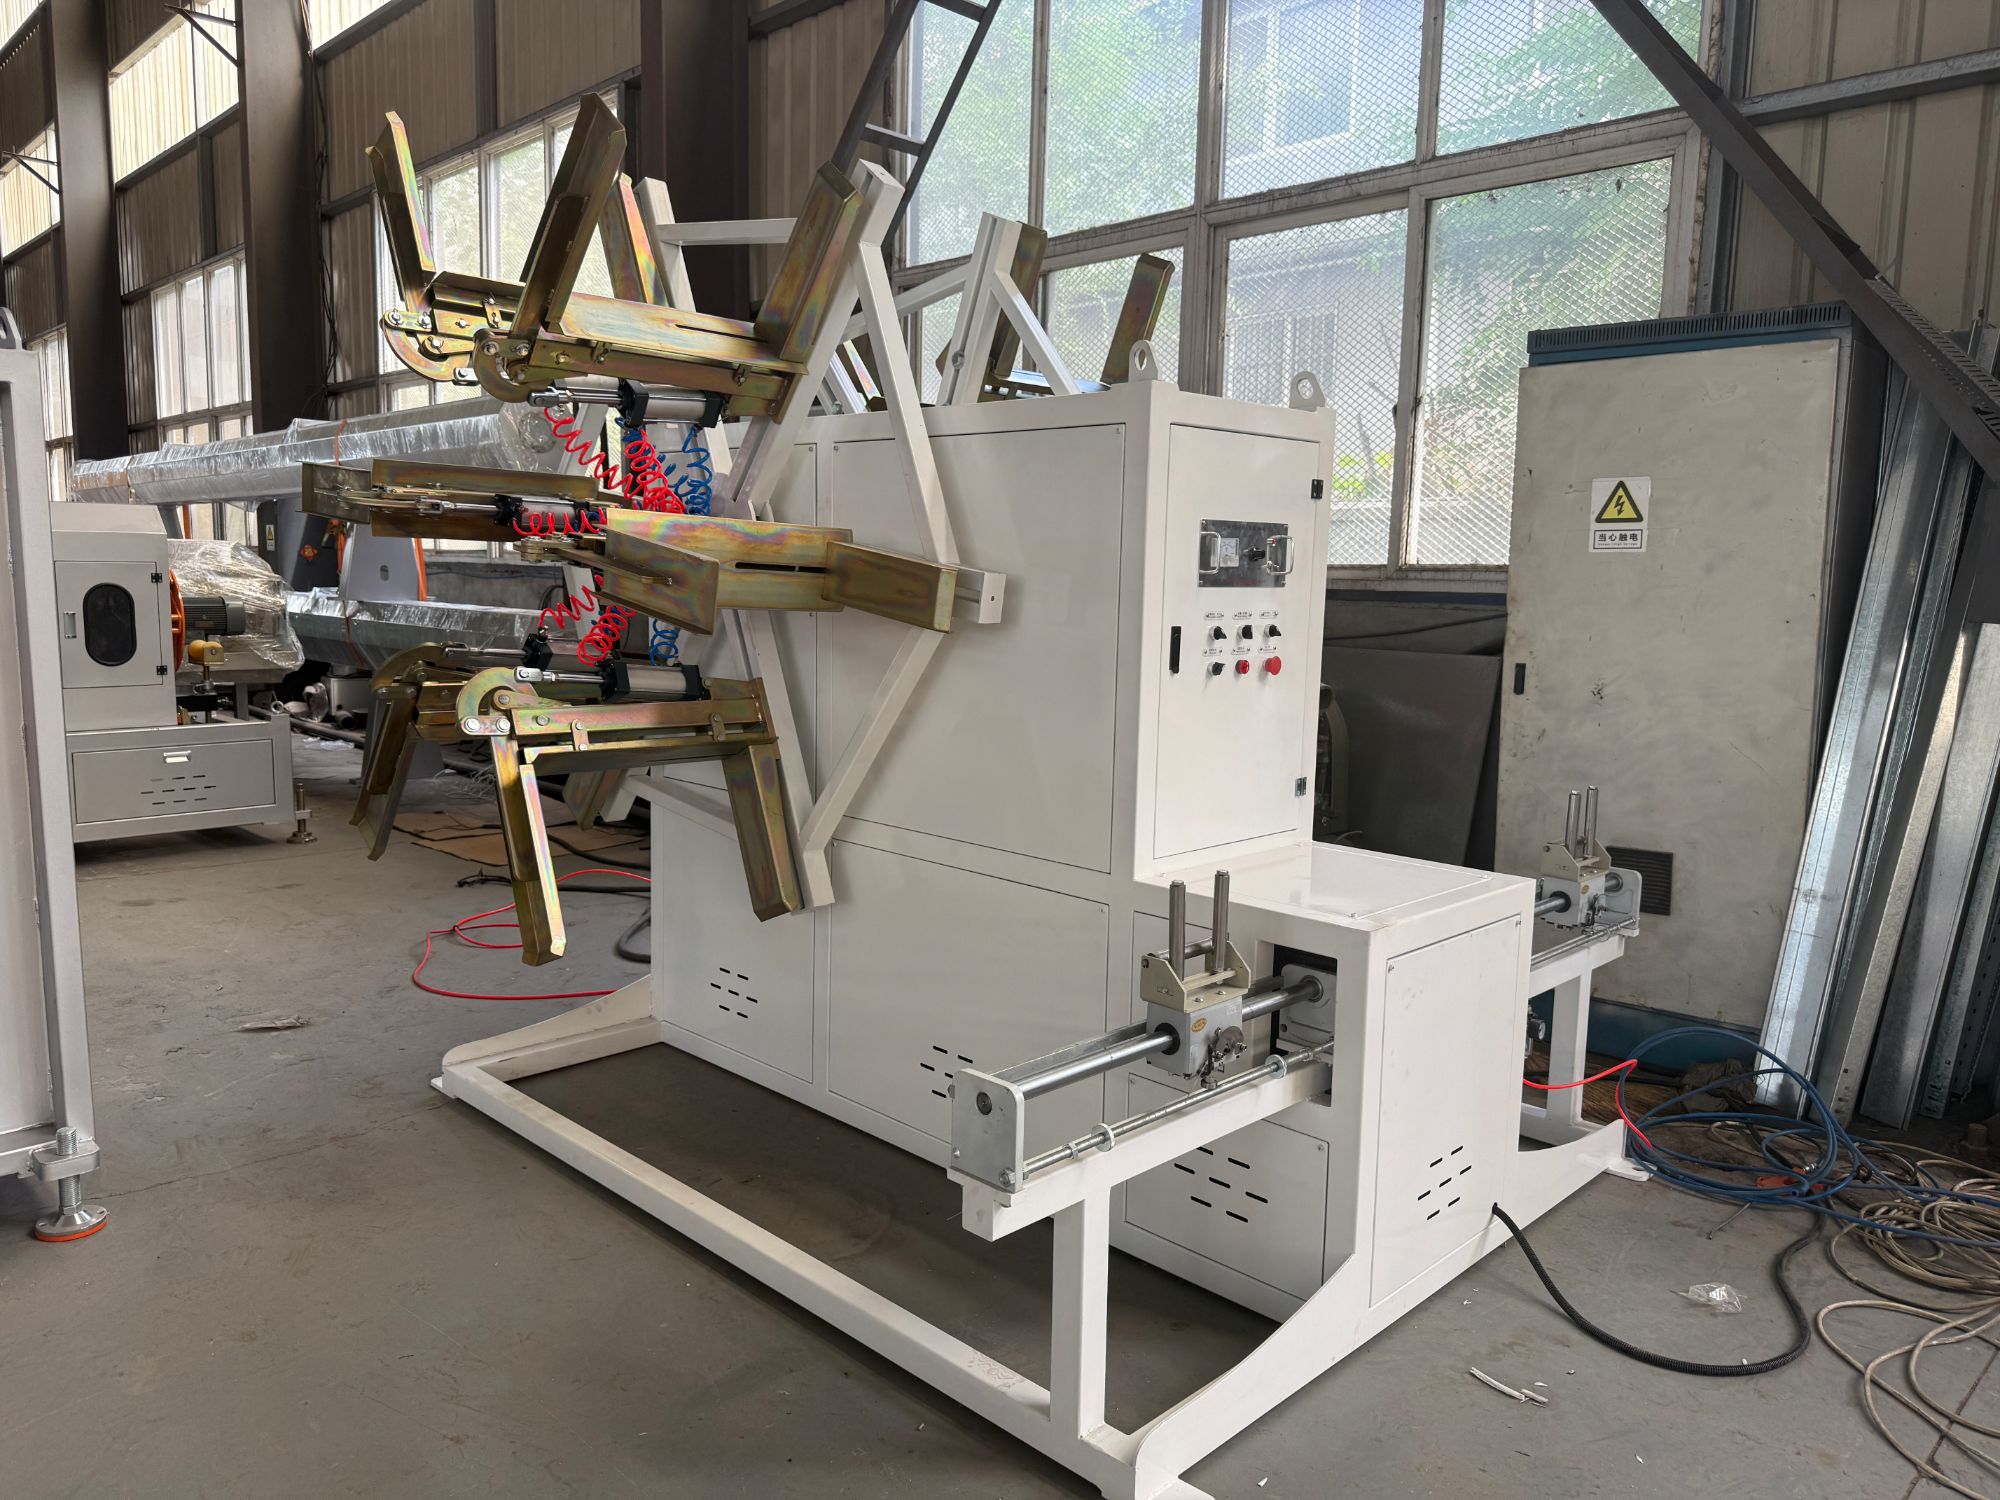
Getting the screw and die right starts with how your resin behaves under heat and shear. A mix heavy on wood flour or mineral fillers won't flow like a neat polymer, so the screw needs deeper flights in the feed zone to avoid bridging and a compression ratio that doesn't overwork the material. If you're running a highly filled compound, a single-stage screw with a gentle transition often beats an aggressive barrier design, simply because it gives the filler less chance to pack up and stall the line.
Die geometry should follow the same logic: land length matters more than most people think. A short land can cause die swell and poor surface finish, while a long land raises back pressure and can scorch a heat-sensitive mix. For wood-plastic composites and similar blends, a slightly tapered entry into a moderate land length helps maintain melt integrity without forcing the resin to sit too long at temperature. Watch the pressure drop across the die too—if it's too high, you're wasting energy and risking degradation; too low, and you lose control over output consistency.
Small adjustments often solve big problems. Changing the screw's mixing section from a Maddock to a pineapple style can improve dispersion of lubricants and coupling agents that tend to clump. On the die side, rounding the corners of profile openings reduces dead zones where material can degrade. Test with a lower melt temperature first, then raise it only if you see unmelts or rough edges—this keeps the resin mix from breaking down while you fine-tune the tooling.
Cooling Tanks and Pullers: The Unsung Heroes of Line Speed
Most extrusion lines live or die by what happens after the die. Cooling tanks and pullers rarely get the spotlight, but they quietly set the ceiling for how fast you can actually run. A tank that fails to strip heat evenly leaves the profile with soft spots, forcing the puller to slow down just to keep dimensions stable.
The puller, in particular, is where line speed gets either protected or thrown away. If its grip pressure fluctuates or the belts slip, the operator has no choice but to dial back throughput. Precise speed matching between the puller and the extruder isn't a luxury; it's what keeps thin walls from tearing and thick sections from sagging.
Together, the tank and puller act like a pacemaker for the whole line. Upgrading either one can unlock speed gains that no screw or die tweak would ever deliver on its own. It's often the difference between a line that crawls and one that runs at the true limit of the material.
Commissioning Without Chaos: A Step-by-Step Run-In Plan
The moment equipment arrives on site, the urge to power it up and see if it works is hard to resist. But a run-in plan without clear sequencing turns into a tangle of tripped breakers, half-logged readings, and warranty-denying mistakes. Instead, break the startup into three gates: static checks, no-load rotation, and loaded operation. At each gate, record baseline readings before touching a single setting. That way, when something drifts outside tolerance, you know exactly where to look.
A practical run-in log doesn't need to be complicated. Use a clipboard or a shared spreadsheet with columns for time, ambient temperature, vibration, current draw, and any unusual sound. Run the machine in 30-minute blocks, then stop and feel bearing housings and check fastener torque. It feels slow in the moment, but those small checks catch loose connections and dry couplings before they become callouts at 2 a.m.
Wall Thickness Control: Adjustments That Make or Break Quality
Wall thickness rarely fails because the average is off. It fails when a thick boss meets a thin sidewall, or when a rib is left at 90% of the nominal wall and the material can’t pack that area after the gate freezes. You see it as sink marks, warpage, or dimensional drift that shows up hours after the part leaves the mold. One of the quickest ways to fix that is not to crank up pack pressure, but to redraw the section so the cooling rate stays closer to uniform. If a thick section can be cored from the back or split into two thinner features, the part will often stabilize even with a shorter cycle.
Gate placement does more for wall thickness control than most people expect. A gate that’s too small, or placed at the thin end of a part with a heavy section at the far side, will freeze before the thick area gets enough material to compensate for shrinkage. Moving the gate closer to the heavy section, enlarging it slightly, or using a tab gate can change the outcome more than adding 0.5 mm to the whole part. When you do add thickness, do it locally and blend transitions with a slope or radius, never as a sharp step. Sharp steps create a line where flow hesitates and cooling diverges, which is exactly where warpage starts.
Material choice also shifts what “good” wall thickness means. A glass-filled nylon with a thin, long flow path will freeze faster and may need a thicker wall or hotter mold to fill, while an unfilled polypropylene can often go thinner if the design avoids heavy accumulations. On the floor, the useful discipline is to change one variable at a time and record short-shot weight, fill time, and part weight after a stable hold phase. Otherwise you end up chasing a wall thickness change with a melt temperature change and never know which one actually fixed the part.
Keeping Your Custom Line Running Long After Installation
The first few months after a custom line goes live reveal more about its future than any commissioning report. Watch how operators compensate for small frictions: a piece of tape holding a sensor steady, an interlock that gets bypassed at shift change, a feed rate someone dials back to avoid jams. These workarounds aren't laziness; they're early warnings that the line's design and real-world use have drifted apart. Fix the root cause now while the team still remembers why the line was built that way, and you'll prevent the slow erosion of performance that quietly becomes the new normal.
Documentation that actually keeps a line running doesn't live in a three-ring binder on a shelf. It lives in the notes your maintenance techs scribble on the inside of a panel door, in the photos someone took during the final wiring changes, and in the short video clips of the correct sound a healthy cycle makes. If you want the line to outlast its original installation crew, turn those fragments into a living file—one that gets updated every time a part is replaced or a parameter is tweaked. Then make sure the next shift can find it without asking three people.
Finally, treat spare parts strategy as a conversation, not a list. Ask the line's original integrator which components have the longest lead times and which ones are most likely to fail in year two, not just year one. Keep one extra of anything that would stop the line for more than a day if it died. And schedule a walk-through every quarter where an operator and a technician move through the line together, touching every connection, listening for changes, and noting anything that feels different from the week after installation. Small, scheduled attention beats a heroic overhaul every time.
FAQ
A custom line is built around your specific diameter range, wall thickness, output targets, and factory layout rather than forcing you to adapt to a fixed configuration. That usually means tailored extruder size, die head design, vacuum calibration, cooling length, haul-off capacity, and even automation level, so the line matches the actual product mix you plan to run.
Start by defining the pipe dimensions you will actually produce most often, the required output per hour, available floor space, and utility supply. Then map out the material handling, scrap recycling, and downstream cutting/stacking needs. Many projects stall because these basics are not fixed before contacting equipment suppliers.
Match the extruder output to the largest pipe diameter and wall thickness you intend to run, not just the maximum diameter. For example, a 90mm extruder may handle 630mm thin-wall pipe, but thick-wall 630mm pressure pipe often needs a 120mm or larger screw. Also account for melt homogeneity and backpressure from the die.
The die head controls wall thickness distribution and melt flow. Custom lines often use spiral mandrel dies or basket dies depending on whether you prioritize pressure loss, color change speed, or multi-layer capability. Oversizing the die head slightly for future product expansion can save a costly retrofit later.
A realistic timeline is 6 to 10 months: 4-6 weeks for detailed engineering, 12-16 weeks for manufacturing and assembly, 2-3 weeks for factory acceptance testing, and another 3-5 weeks for shipping, installation, and commissioning. Custom automation or special downstream equipment can add 4-8 weeks.
Underestimating cooling length for thick-wall pipes, ignoring the need for precise vacuum calibration, choosing haul-off capacity too close to maximum, and not planning for future diameter changes are frequent errors. Also, some buyers focus only on extruder price and neglect the die, calibration sleeves, and cutting system which heavily affect product quality.
Use a gravimetric dosing system for stable material feed, maintain a well-designed melt pump if running high output, and invest in an automatic wall thickness control system on the vacuum tank. Regular calibration checks of the centering device and haul-off speed synchronization are also critical.
Ask about reference installations for similar pipe sizes, the maximum output guarantee at your specified wall thickness, spare parts availability for critical components, training included in commissioning, and whether the control system supports remote diagnostics. A good supplier will also provide a detailed utility consumption table.
Conclusion
Planning a custom HDPE line falls apart when people skip the first hard question: what exactly will this pipe face in the field? Pressure surges, abrasive slurries, UV exposure, or a specific stiffness class dictate wall sections and resin choices long before a single barrel heats up. Once those demands are clear, the screw and die geometry have to be matched to your particular resin mix—not just any HDPE grade. A barrier screw that works for one blend may create excessive shear or unmelted pellets in another, while a poorly sized die land can cause melt fracture or uneven swell. Then there are the parts nobody brags about: cooling tanks and pullers. Their length, water flow, and vacuum sizing determine whether you can actually hold tolerances at higher line speeds. Skimp here and the extruder becomes irrelevant.
Commissioning does not have to be chaos if you follow a staged run-in: start slow, verify melt temperature and head pressure, then raise output only after each zone stabilizes. Wall thickness control is where operators earn their pay—tiny changes in air gap, vacuum level, or haul-off ratio can turn a good pipe into scrap. Before adjusting anything, measure at multiple points around the circumference; a single reading hides sag and ovality. Long after installation, the line still needs attention. Keep historical data on wear parts, especially screw flights and puller pads, and schedule inspections around actual resin throughput rather than the calendar. A custom line is not a set-it-and-forget-it machine. It is a system that rewards those who treat every subtle shift in amperage or diameter as a signal worth investigating, not a nuisance to override.
Contact Us
Contact Person: LISA LEE
Email: [email protected]
Tel/WhatsApp: +86 13780696467
Website: https://www.qdpipemachine.com